
Get Started: Planting a flower garden: 3 steps for beginners
Start small in spring. Watch carefully in summer. Plant daffodils in fall.
If you're thinking about creating your first flower garden in 2009, following those three steps will give you a good chance at success, a low-cost test to judge whether horticulture is for you, and a basic introduction to the joys and successes that await if you continue next year.
START SMALL
You'll be happiest if you contain yourself to a small plot. It may not be easy to rein in your plans, especially when you come across photos of spectacular landscapes in the countless catalogs and online offers that will inevitably come your way. Failure is a constant in gardening, but success in a small space is far preferable to an ambitious undertaking that leads to dying plants and raging weeds.
Besides, if after one year you find out gardening's not for you, you'll have spent less time, money and effort to find out. And if your little plot flourishes, and you find yourself delighted, you'll have a better idea of what you're in for as you expand your space, try new plants and test more complicated techniques in 2010.
With that in mind, your first step is to pick out a good spot, assuming you have a choice. If your climate is temperate, you'll want as much sun as possible. As you gain experience you'll want to deal with the challenges and pleasures of gardening in the shade, but that can wait. (Would-be gardeners in the hottest parts of the country have special requirements and should seek local advice.)
Remember that you'll have to drag a hose or lug a watering bucket to your garden, so don't put it too far from a spigot. And if you can, place it where you can see it from inside or where you'll pass it every day. It's easy to neglect a hidden garden.
Testing your soil and learning how to improve it - with compost, peat moss, manure and such - is an important and interesting part of gardening but that can wait until next year. Remember, we're sticking to the basics in 2009.
The next step is to literally dig in. Wait until spring frosts are unlikely in your region (a date you can get from your local Cooperative Extension or other online source) and the ground is not wet, and then grab a pitchfork or spade and dig down into your little plot to break up the soil. You'll want to remove stones, grass and weeds and break up big clods of earth so your baby plants can get a foothold. Toss in some fertilizer (ask for a balanced, time-released type), rake it smooth, water well and you're ready for planting.
Don't worry, just yet, about seeds. It's great fun to start seeds inside, giving you a head start on the season, but it can also be tricky - again, wait to see if you're interested next year. This year, just head to your local garden center and see what annuals are for sale.
Annuals are plants that live their entire life in one year. Perennials are the ones that survive winter and return in spring. Under our keeping-it-simple program, restrict yourself to annuals this year (until fall, when we get to the daffodils). But keep dreaming about the perennials, shrubs and trees - to say nothing of vegetables- you can try later. After all, you have a lifetime.
Ask for advice at the garden center, or from gardening neighbors, about which annuals might do best in your plot: consider marigolds and zinnias if it's really sunny, impatiens and wax begonias if you're stuck with shade. They come in little plastic cells, often in six-packs or flats of 24. Remember that they're going to get a lot bigger, so don't overbuy. Pick plants that are compact rather than leggy, green rather than yellowing, with buds rather than already in flower.
Water those babies when you get them home, then head out to your waiting garden plot with your plants, a trowel and a watering can. One by one, pop them out of their cells, spread their roots just a bit, dig a small hole with the trowel and carefully set them into the bed. Firm the soil around the roots, then immediately water each plant well. Next morning, water them again.
WATCH CAREFULLY
OK, the garden is in. But you have to keep an eye on it as you wait for the payoff of beautiful flowers. Don't rely on rain; keep the watering can handy and make sure the soil is always moist just under the surface. In summer, you'll have to check daily. If you go away, employ a neighbor.
Keep after the inevitable weeds. If mulch is available, it will help, but your garden is small enough, and you're watching closely enough, that you can keep on top of invaders.
By July, the original fertilizer may be exhausted; add more, following the directions on the package. If your plants get so tall they want to flop, use twigs or stakes to prop them up. If any problems develop, or you're invaded by deer or other critters, go online or to the garden center for solutions. Horticulture and Fine Gardening magazines, along with Martha Stewart and many others, have excellent sites.
Meanwhile, enjoy! Watch those buds turn into blooms under your care. Cut some for inside. Brag a little.
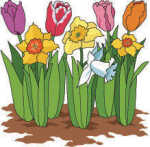
PLANT DAFFODILS
Come October, it's time to expand beyond your little plot and think about next year. Buy as many daffodil bulbs as you can afford (well, keep it under 100). Pick up fat, firm ones at the garden center and plant them 6 to 8 inches deep wherever you'd like to see them pop up (but not where they'll get mowed with the grass).
As your annuals die with the frost and winter sets in, and you begin thinking about next year's garden (and keeping a garden journal), you'll know that under the frozen soil, these wonderful, nearly carefree bulbs are already waiting to release bright yellow (or white, or pink) flowers to greet you next spring.